Allowing public access to cloud native storage services – such as AWS S3 Buckets, Azure Blobs, and similar services – can inadvertently increase your risk of being compromised. Attackers leveraging public access to explore exposed files in these storage services can discover critical and sensitive data through “a hole in the bucket.” Here’s what you should know.
Is your cloud native storage leaking data?
Use of cloud services have exploded in recent years, growing to a ~$330 billion industry in 2024, according to a recent Statista analysis. With easy-to-deploy resources such as cloud computing, storage, network, and services (databases, applications, ‘service buses’, etc.), it’s no wonder companies have quickly adopted cloud-native solutions. Further, cloud migration limits the need to invest in on-premise resources, making it attractive for most organizations.
While the cloud is easy to use, it is hard to master.
In many clouds, settings are “insecure by default.” We’ll focus primarily on AWS examples, but several of these defaults remain prevalent across all large cloud providers.
Here are some examples to illustrate typical “insecure by default” issues.
For AWS specifically:
- Until a few years ago, S3 buckets USED to be public by default
- Use of a Global Naming Namespace required (for example, only 1 bucket called Neuvik is allowed)
- Web Ports allow all inbound traffic, hard to restrict
Broadly across many cloud providers:
- Use of S3 Compatible APIs for cloud buckets
- Easily enabled (or default) “public access” to all bucket resources
- Over-permissive built-in roles (see below for additional information!)
Given these risks, it’s unsurprising how many cloud breaches have occurred. Headlines like “A hacker gained access to 100 million Capital One credit card applications and accounts,” “Microsoft 365 Breach Risk Widens to Millions of Azure AD Apps,” “Misconfigured Amazon Server exposed Prime Video viewing data,” and “Data of 820,000 students compromised in hack: DOE” are unfortunately not uncommon.
Remember that the cloud was designed to make storage and other services accessible, and these headlines begin to make sense. Storage is (or was originally) public by default. Virtual Machines get public IP addresses. Databases are exposed to the internet. Risk will always exist – but can it be minimized?
Good news: these resources can be locked.
Neuvik Case Study: assessing risk in native cloud storage
Our research shows that not only is the content found stored in insecure public buckets both increasing in volume, but also often sensitive in nature. Misconfigurations and legacy defaults are often to blame for these insecurities and can go unnoticed for years. While custom tooling exists to discover and enumerate these publicly accessible buckets and blobs, it does not analyze the file content and may result in an incomplete understanding of risk.
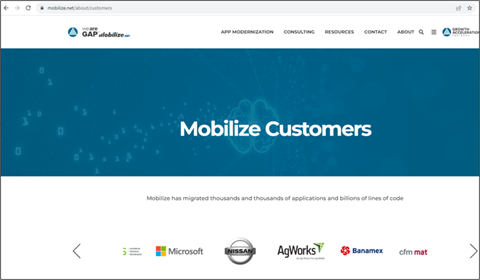
Throughout the last year or so of research, Neuvik has been able to freely locate many cloud-based file shares that contain corporate data. These discoveries are industry agnostic, including but not limited to healthcare companies, government entities, and software manufacturers. In each case, we found that their sensitive datasets are available for download from these file shares. Importantly, the sensitive data contained in these files was not just customer data, but data related to sensitive internal systems.
Critically, the affected organizations can’t defend against what they can’t see or protect what they don’t realize they’re exposing. We’ve seen these “holes in the bucket” expose:
- Patient health information
- Personally identifiable information (PII)
- IT administration guides
- System backups
- Incident response guides (an attacker’s dream!)
- And much more
Based on these initial findings, Neuvik started performing extensive research on Cloud Native Storage, focusing on vulnerabilities related to:
- AWS S3
- Azure Blobs
- Digital Ocean Spaces
- Google Cloud
This led us to the use of a tool called Grayhat Warfare. It indexes Cloud Native Storage with anonymous or public access, and brute-forces the names of Buckets, Blobs, and other similar elements. From an adversarial perspective, this tool can be dangerous – it leverages a “freemium” model allowing anonymous or registered users to gain access to this data at no cost (with various limitations depending on account type).
Before we dive in, a brief disclaimer: the author of this blog and primary researcher is a well-respected SANS instructor in addition to his role at Neuvik, and the following methodology was conducted for research purposes only. Neuvik does not condone or encourage using this methodology or any of the tooling described for malicious purposes.
With that said, let’s dive in!
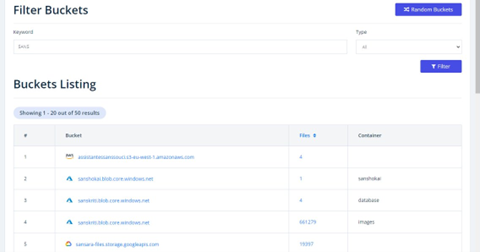
Using Grayhat Warfare, we began by filtering by bucket name, using the cybersecurity research firm SANS as our example target to filter by bucket name.
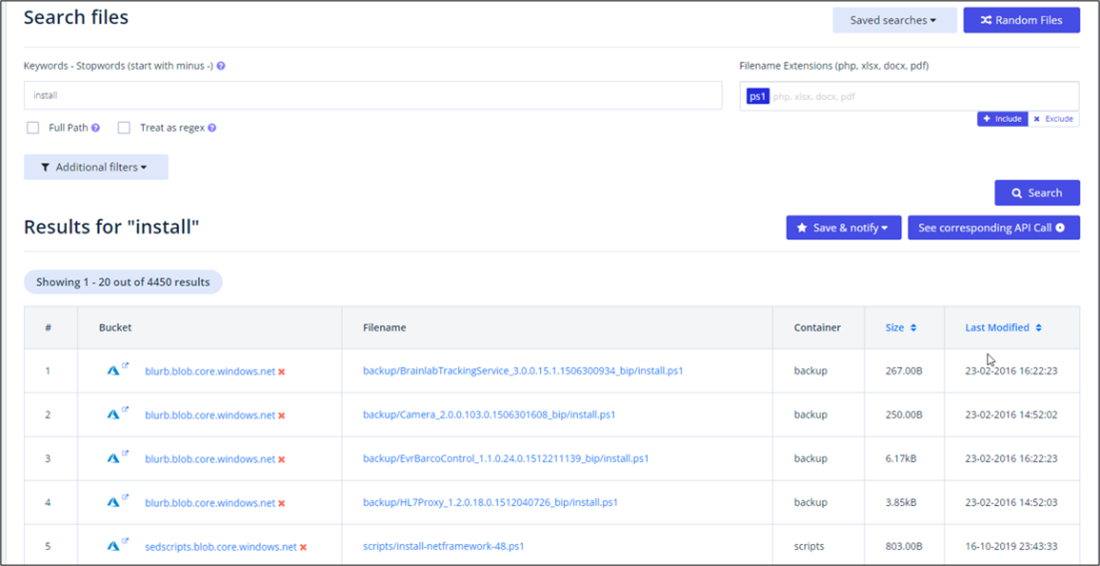
Then, we filtered by file name in place of bucket name…
And then, used even more filters…
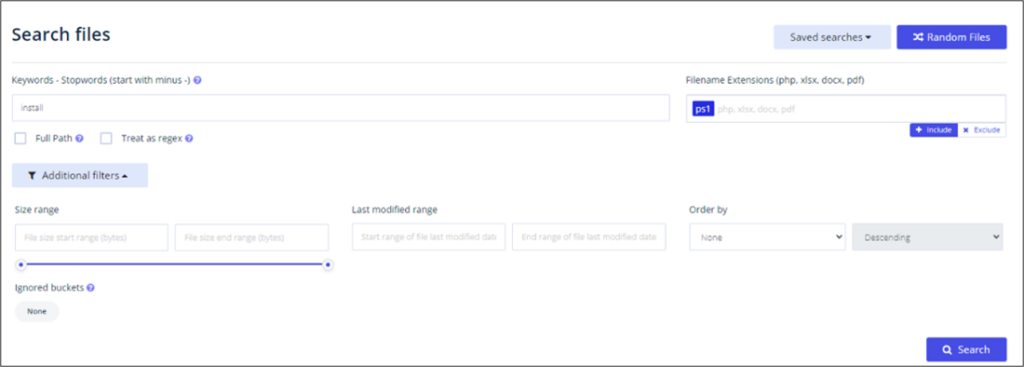
And after that, even more filters. Here are some examples of filtering we used:
- Search for keywords
- Minus (-) used to remove options that match
- Full path – keyword anywhere in path
- File extensions
- Include or Exclude
- Mutually exclusive
- Filter by Bucket ID
- Numerical value
- Seems to change when reindexing occurs
- https://buckets.grayhatwarfare.com/docs/api/v2
However, filtering is useless without a broader methodology.
To make the most of filtering, we started by searching for “interesting files” (Install.ps1, Install.bat, Install.cmd). We then learned how Grayhat Warfare interpreted the search queries:
- Install.ps1 -> *install*.ps1
- Install.bat – > *install*.bat
- Install.cmd -> *install*.cmd
Using a manual process to search for and download the files, we looked to see if anything “interesting” could be found. We discovered that content couldn’t be reviewed before downloading, the files themselves weren’t indexed, and no information was immediately available about the files.
This is due to a limitation in Grayhat Warfare. It only shows the names of the files and buckets/blobs indexed but is unable to search for content in files.
So, we created a solution to that problem: BucketHoarder.
Introducing: BucketHoarder, for use with the GrayHat Warfare API
Our need to search for content in files led to the creation of Neuvik’s ‘BucketHoarder,’ for use with the Grayhat Warfare API.
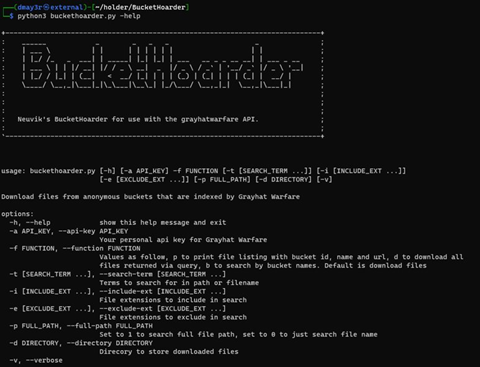
We built BucketHoarder to:
- Query GHW APIs
- Conduct searches based on search terms
- Download all files matching the query
You can use BucketHoarder, too! Access it here: https://github.com/Neuvik/BucketHoarder
Here were the results when we used BucketHoarder on the results of our GHW search:
We automated the file downloading, downloaded all the relevant matching files, performed searches and reviewed files for interesting content, and then went back and downloaded the rest of the entire bucket.
As you might guess, this took up a lot of storage. So, we purchased more storage for our research.

With storage requirements met, we could get back to the “fun.”
Using BucketHoarder: Exposing the “Holes in the Bucket”!
Disclaimer: everything shared here has been reported and most remediated. In many cases, it took weeks to get in contact with someone to report these vulnerabilities. (If your company does not have a way to easily report vulnerabilities, set one up!)
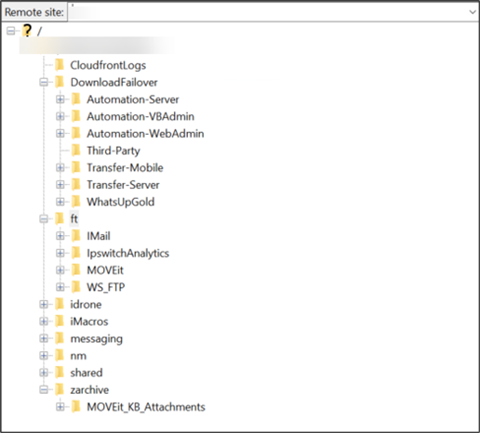
To kick off our exploration of the downloaded files, we searched for .PS1, .bat and .cmd files with install in the name. We had several hits within one storage blob. Then, we decided to download all of it to review and started to search through files for key words like “Password,” “Key,” etc.
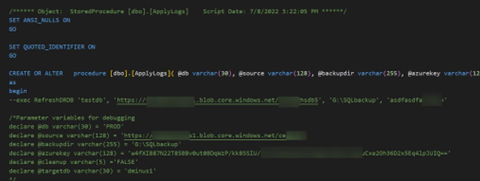
Let’s go back to install.ps1 and see how quickly we can find sensitive data:
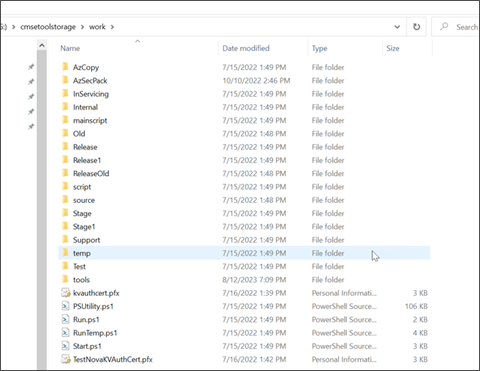
It started out by reviewing all the PowerShell scripts.
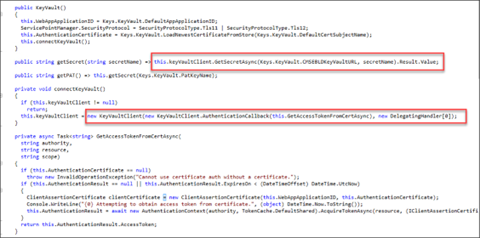
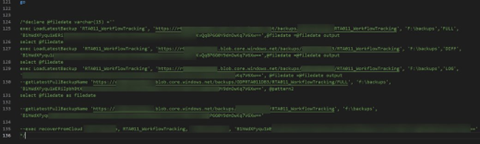
We found a file named AzureHelper.ps1 that looked interesting:
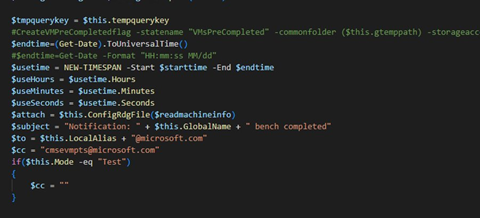
In particular, we discovered plain text email addresses used by this script.
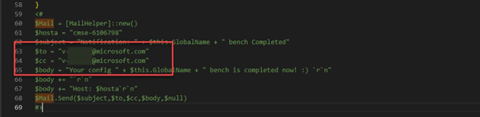
How is this email sent? Thankfully, we have the code for that…
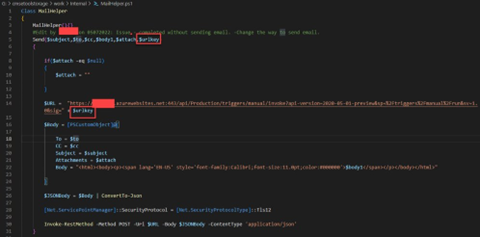
What is the magical URL key? Now we’re getting somewhere…
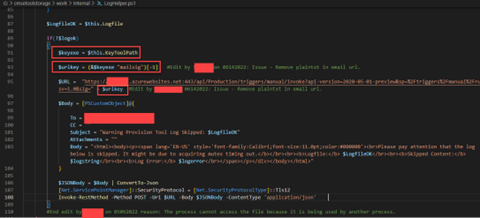
What about the keytool?


Sounds like it’s time to find the key…
Renew KeyVault Cert? Yes, please.
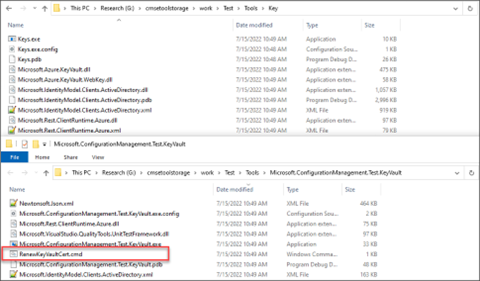
Let’s search for certificates. Grep to the rescue!
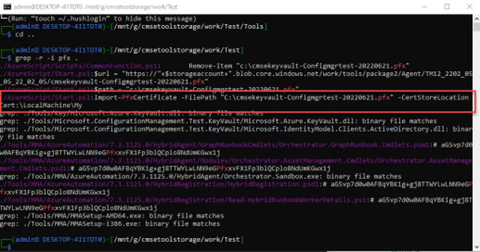
What?! No password?

We have the (private) key!
What does keys.exe do? Time to decompile.
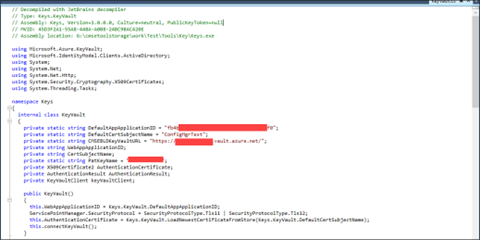
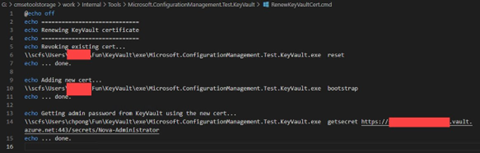
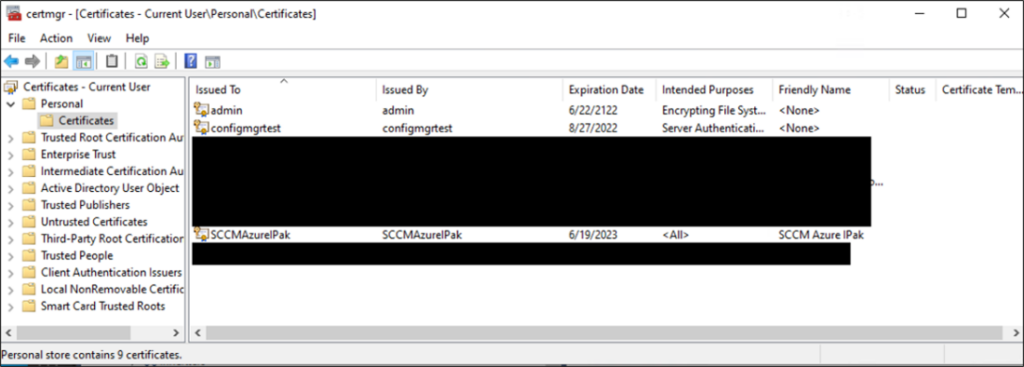
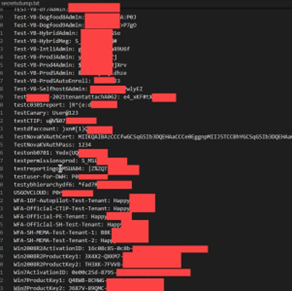
I want all the secrets, but don’t have names…

Voilà!
Next, we looked at more PS1 files…
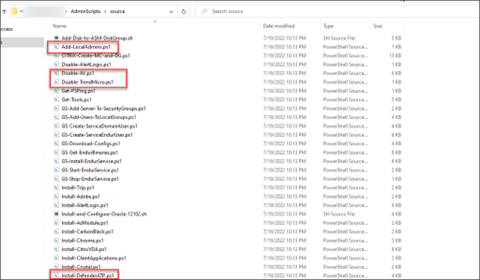
Then local admin files…
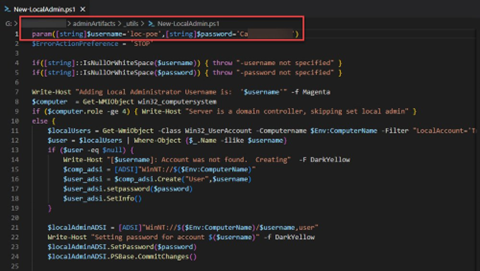
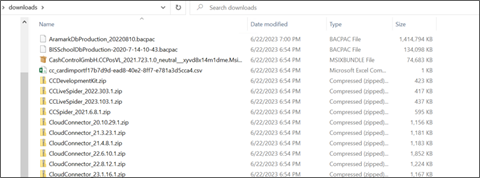
What other files did we ultimately find “interesting”? Let’s see.
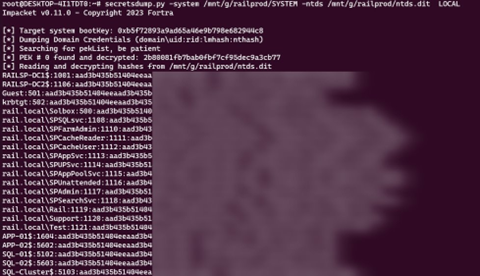
- NTDS.dit- the Active Directory Database
- .PFX – Certificates
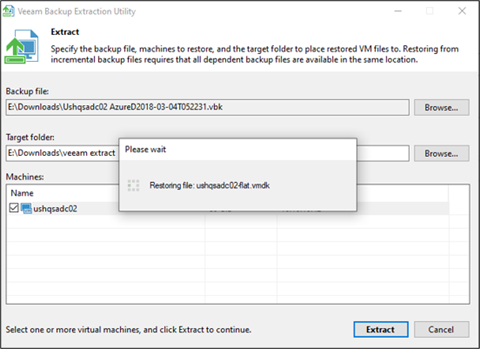
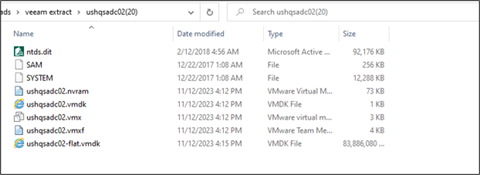
- .VBK/.VIB/.VBM – Veeam Backup files
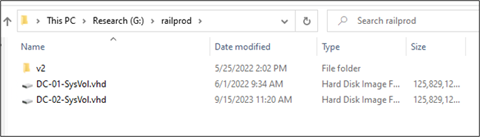
- .VHD – Virtual Hard Drive (VHD) files
- .VMDK – VMware Disk files
- .VMX – VMware config files
- id_rsa/id_ed25519 – private keys
- credentials.csv – AWS Access Keys
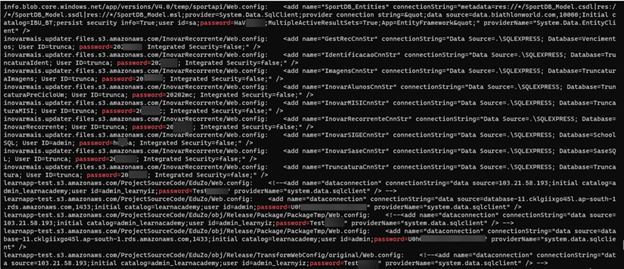
- Web.config – IIS web config files
- .tfstate/.tfvars – Terraform state and variable files
And the list goes on…
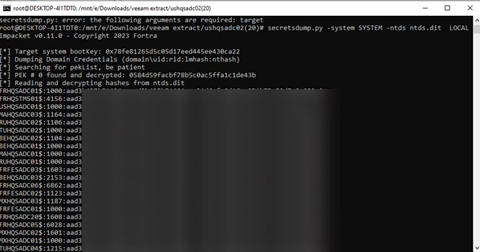
We found tons of VHD Files. We needed to refine – so we used “DC” in the name to isolate “Domain Controller” files (for less technical readers, the Domain Controller authenticates users and provides security for the network domain).
Here are the dumped hashes from the DC:
We also looked further into the discovered Veeam backup files…
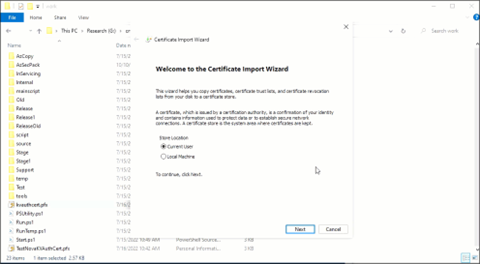
And then took a closer look at certificates, ultimately finding an expired code signing certificate.


Once we’d discovered this, we looked for BACPAC files, which provide a snapshot of a given database / server. We were able to restore the BACPAC file…
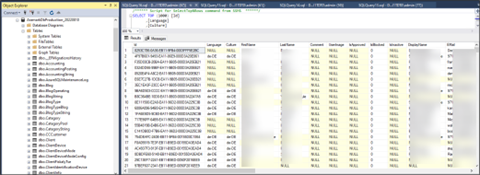
…and presto, we discovered Azure credentials.
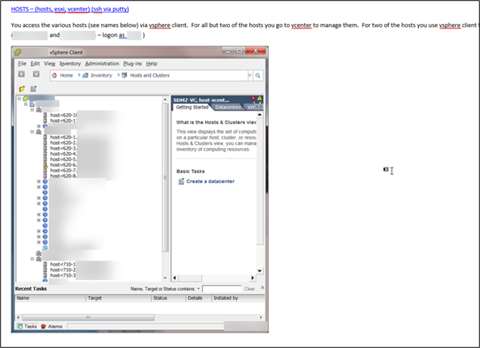
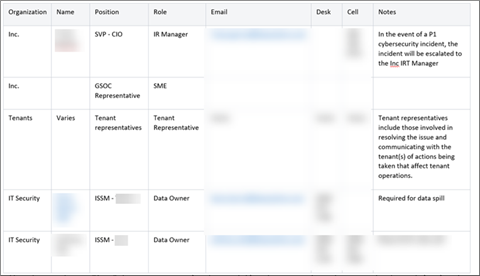
We also gained access to the 72-page Admin Guide, which listed passwords, activation keys, and more.
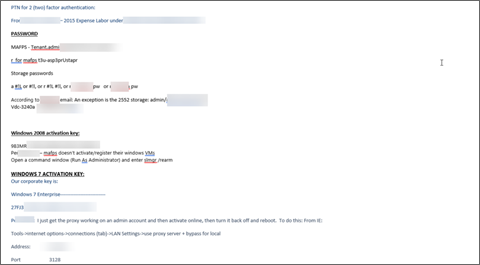
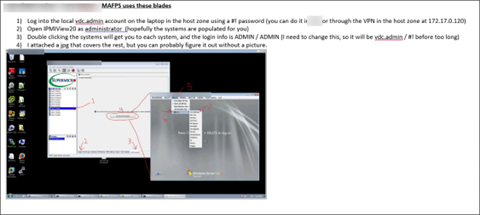
We even found the Admin Guide Incident Response Plan (IRP).
As though the above weren’t enough, we also found software installers.
But wait… there’s more! Remember this?

This certificate is for an SAS token for the Blob.
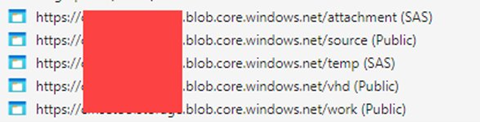
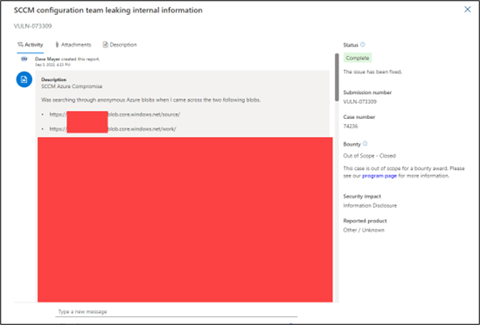
It shouldn’t need to be said, but to be explicit: we did not act on the information found and paused our exploration here. In the wrong hands, the data discovered provided not only administrative credentials for the entire Azure instance, but significant data that could be used by a malicious actor to plan a persistent, clever attack against this organization.
What happened next? We reported to Microsoft. Public and authenticated access was disabled in less than six days.
As you can see, there’s a lot of holes in the bucket here. To recap, BucketHoarder found:
- Azure Credentials
- Virtual Hard Drive files
- Certificates
- Veeam Backup Files
- BACPAC Files
- A 72-page Admin Guide
- Incident Response Plans
- Software Installers
- An SAS Token
Yikes.
A Quick Guide for Preventing “Holes in the Bucket”
Fortunately, there are actionable steps to prevent a “hole in the bucket” in your native cloud storage.
Step 1: Disable all anonymous or public access.
Step 2: Use authenticated access.
Which means:
- AWS – Signed URLs
- Azure – SAS Tokens (Can be configured with granular permissions)
- Digital Ocean – Pre-signed URLs
- Google Cloud – Signed URLs
Step 3: Have a designated way to report vulnerabilities to your organization. If someone happens to discover a public vulnerability, make sure they have a way to report it to you so you can remedy it.
Being aware of the risks inherent in public access to native cloud storage helps avoid the exposure of sensitive and critical data. With the above techniques in place, you can prevent “holes in the bucket” from leaving you vulnerable to attackers.
Want to learn more?
Want to learn more about how to prevent overly-permissive roles in the cloud? Read more:
- https://neuvik.com/article/how-to-evaluate-audit-excessive-permissions-in-aws/
- https://neuvik.com/article/role-based-permissions-in-aws-cloud-routinely-introduce-simple-pathways-for-unauthorized-access-when-not-checked/)
Prefer to watch a video summary? Watch Dave’s recap at SANS: A Hole in the Bucket: The Risk of Public Access to Cloud Native Storage
Need help understanding whether your organization’s cloud storage is vulnerable? Learn more about Neuvik’s Cloud Security Assessments and Cloud Penetration Tests at https://neuvik.com/our-services/advanced-assessments/ or contact us for a consultation at contact@neuvik.com